Internal Bridging
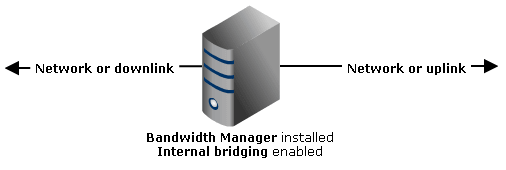
Bandwidth Manager can forward traffic between two or more network cards. This feature is useful when the PC running the bandwidth manager acts as a bridge between two networks, or between a network and an ISP connection. Moreover, a bridge can be plugged into almost any network to manage and control its network flow. In other words, it works as a transparent bridge.
To define a bridge, select Tools - Bridging from the main menu and choose the Ethernet adapters you want to join:
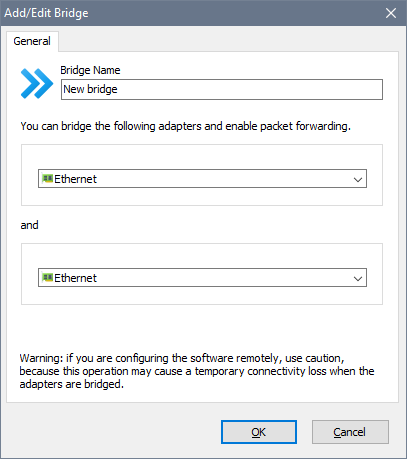
Once a bridge is defined, the software begins forwarding the traffic between the bridged adapters and you can proceed with rules. It is not recommended to configure rules with the Any interface scope as that might cause double packet processing and lower the performance.
Since the bridge is transparent, your network addressing scheme does not change. For example, you put the bridge between your network that uses 192.168.0.x addressing and a router that has address 192.168.0.1. Network cards merged into the bridge should be assigned any unused addresses in the 192.168.0.x range, so that the bridge itself will be able to communicate. The default gateway for network clients would still be 192.168.0.1 because requests from the clients would come through the bridge transparently to the router and back.
Potential connectivity issues
In some cases, after you have enabled bridging you can find that although the computers in the LAN can access the Internet normally, the bridge itself is unable to access the Internet or to connect to any computer in the LAN. This happens because of an incorrect IP configuration and routing of the bridge. In the following example we use a 192.168.0.x network with a router assigned 192.168.0.1 to explain the problem and suggest a solution:
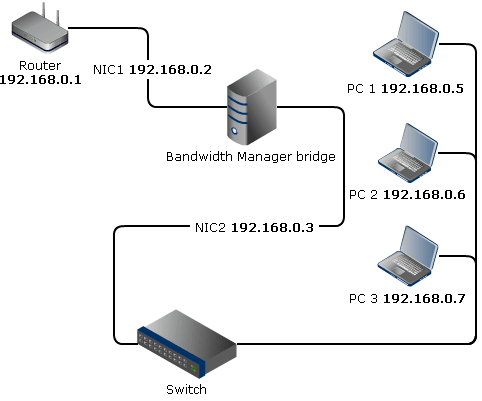
A common mistake is to specify the default gateway on both NICs in the bridge. The following configuration is wrong because both NIC1 and NIC2 are assigned the default gateway while the gateway is hooked up to NIC1.
NIC1
IP address: 192.168.0.2
Mask: 255.255.255.0
Gateway: 192.168.0.1
NIC2
IP address: 192.168.0.3
Mask: 255.255.255.0
Gateway: 192.168.0.1
Essentially Windows does not know which NIC to use for Internet access, so it may be unable to establish the Internet connection. Simply remove the default gateway from all the NICs except the one connected to the router.
However, the bridge may still be unable to access the Internet and/or the LAN when both NICs are assigned IP addresses belonging to the same subnet. As the bridge has got two NICs assigned 192.168.0.2 and 192.168.0.3, this is basically a routing issue. Suppose you want the bridge to connect to 192.168.0.7. The question is which NIC should Windows choose to reach this address if it does not know which side it is hooked up to? Thereby we need to give Windows a hint using the route command and adjust the metrics.
Go to each NIC’s Advanced TCP/IP Settings and assign a metric manually. The metric is merely a number representing the cost of a route. We need to assign a higher metric to NIC1. For example, you can assign 100 to NIC1 and 50 to NIC2:
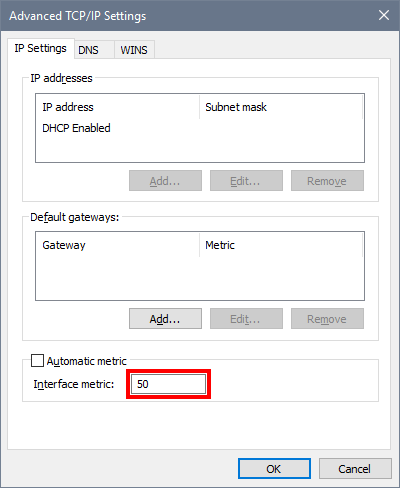
This will make Windows think the route through NIC2 is “cheaper” and it will route local traffic via this NIC properly. However, this will also break the Internet connection. In order to fix it, you need to execute the following command at a command prompt:
route -p add 192.168.0.1 mask 255.255.255.255 192.168.0.2
This tells Windows: access 192.168.0.1 via the NIC assigned 192.168.0.2. So in this case Windows will access the Internet through gateway 192.168.0.1 via NIC1 due to this explicit routing record, and all remaining local addresses via NIC2.