Monitoring
The software can monitor any local printers attached to the computer that has the Print Inspector monitoring service installed. To start monitoring a printer, choose Printer – Add Printer from the main menu:
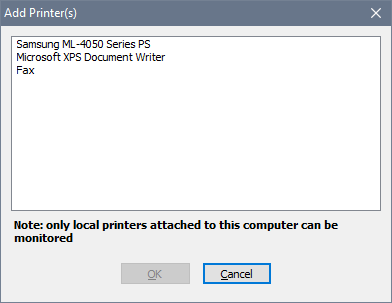
Once a printer has been added for monitoring, it becomes available in the drop-down list of monitored printers. From that moment, all jobs printed on this printer are recorded in the Print Inspector’s database. Detailed records are available on the History tab; grouped usage data is shown on the Users, Computers and Combined tabs. The Queue tab shows current queue on the selected printer and allows you to Pause, Resume or Cancel any queued job:

If you no longer need a printer to be monitored, choose Printer – Delete Printer from the main menu. This will stop monitoring of the selected printer, however it will not remove the printer from the system.
You can temporarily suspend all printing on the selected printer. To do so, choose Printer – Pause Printing from the main menu. This will be indicated by the pause icon next to the printer’s name:

If something goes wrong with the selected printer, it is indicated by the error icon next to the printer’s name:

In this case, check the event log for details.