Getting started
First launch
Ping Monitor opens with an empty list, so the first job is telling it what to watch.
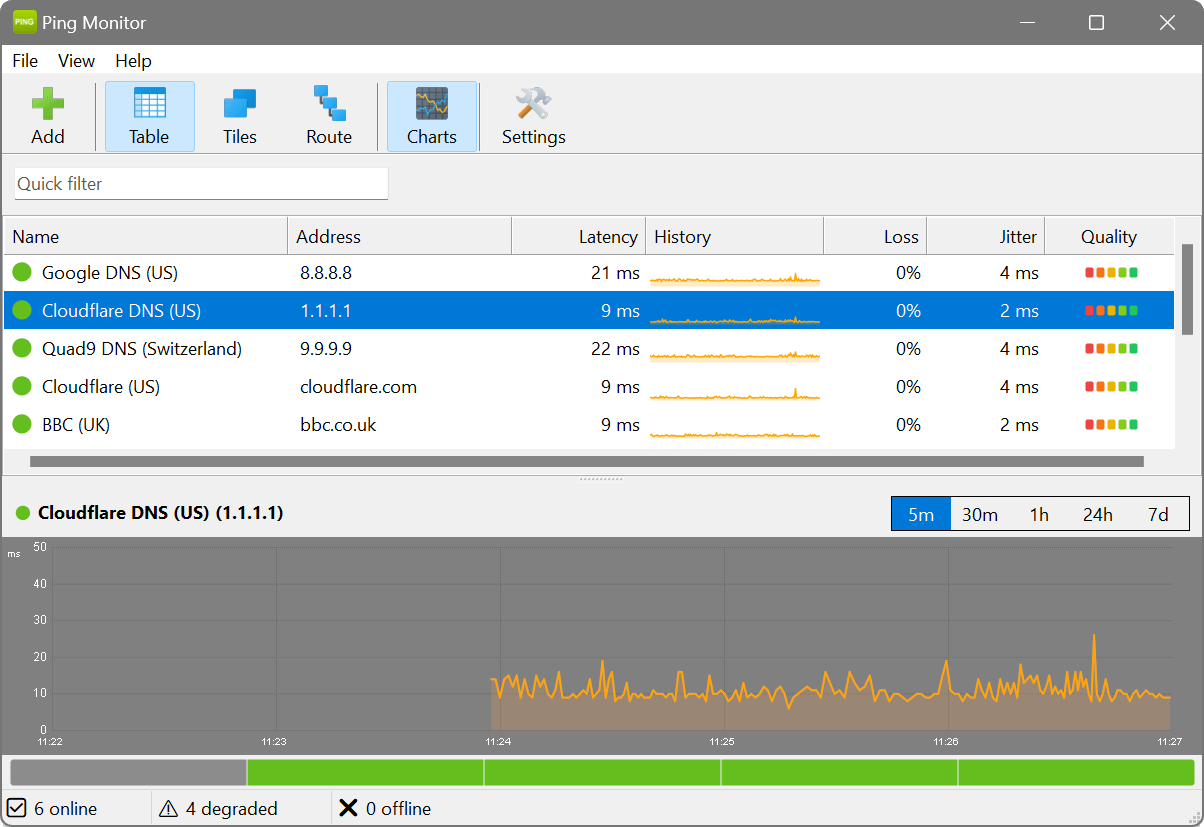
The window comes in four parts: a toolbar for adding hosts, switching views, starting a trace and opening settings; the view area in the middle; a detail panel with graphs for whichever host is selected; and a status bar counting your hosts and how they are getting on.
Adding hosts
- Click Add in the toolbar, or use File → Add Host.
- Enter an IP address or a hostname.
- Give it a display name if you like – leave it blank and the address is used.
- Click Add Host.
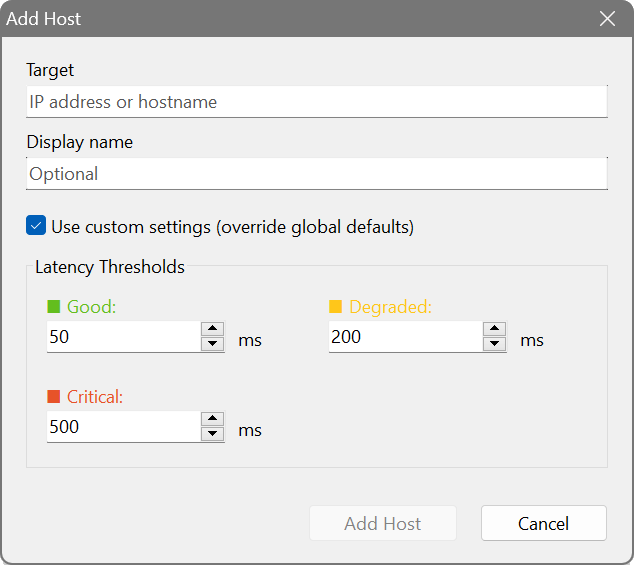
Monitoring starts straight away at the default interval.
The Probes button is there when a ping is not the whole story. It attaches TCP or HTTP/S checks to the host, so you can watch the service and not just the machine it runs on – a web server that answers pings while quietly returning 500s is exactly the case it is for. A host whose probe is failing turns amber rather than red, and the alerts can tell you about it.
In a hurry? File → Add Sample Hosts drops in a spread of well-known hosts from around the world, which is the quickest way to see what the application does. If you already have a list, File → Import Hosts reads a plain text or CSV file – one host per line, with URL prefixes stripped and duplicates skipped for you.
Once there are a few hosts in the list, drag them into the order you want, and use Ctrl or Shift+click to pause, resume or remove several at once.
The three views
Switch between them from the toolbar or the View menu. Table view is the workhorse once you are looking after more than a handful of hosts; tile view turns the same data into a board you can read from across the room; route trace follows the path to one host, hop by hop, when you need to know where the trouble starts.
Pausing a host
Right-click a host and choose Pause Monitoring. It stays in the list but is left alone until you Resume it – handy for a machine you know is down for maintenance and would rather not have shouting at you.
Say you just want to know that your router, your NAS and your favourite game server are all healthy. Add the three by IP address or hostname, give each a friendly display name, and switch to tile view for an at-a-glance board. Leave Ping Monitor running minimised – a glance at the taskbar widget tells you everything is green, and the alerts will speak up if it is not.
Choosing a region for a new game or VPN endpoint? Use File → Add Sample Hosts to drop in a spread of well-known hosts across continents, then sort the table by latency. Within a minute you can see which regions answer fastest from where you are sitting, with the sparklines showing how steady each one is.