Customisation
The Network Scanner offers several ways to extend its functionality and tailor it to your workflow.
Virtual columns
Virtual columns let you combine values from several columns into one, or extract parts of a value using a regular expression. Unlike other columns, they do not retrieve information from remote devices. Instead, they transform data already present in the results. Choose Options → Virtual Columns from the menu.
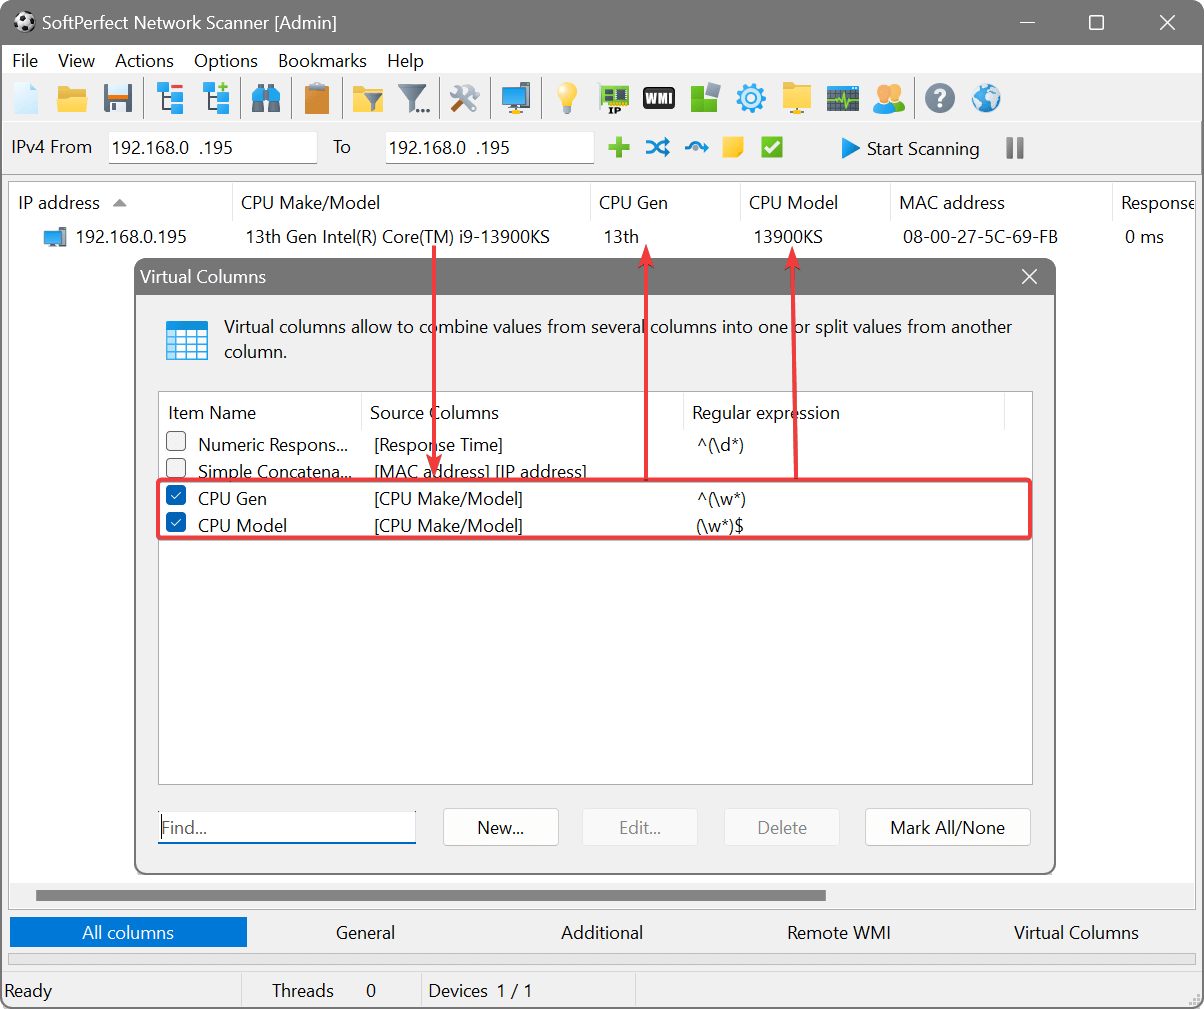
The dialog shows three columns: Item Name, Source Columns and Regular expression. When creating a new entry, use [Column Name] syntax to refer to other columns in the source expression. Optionally apply a regular expression and replacement to extract or reformat the data.
If you have a WMI query returning the full CPU model string (e.g. “Intel Core i7-12700K”), create a virtual column with the source [CPU Make/Model] and a regular expression such as i[0-9]-(\d+) with replacement $1 to extract just the CPU generation number into its own column.
Column appearance
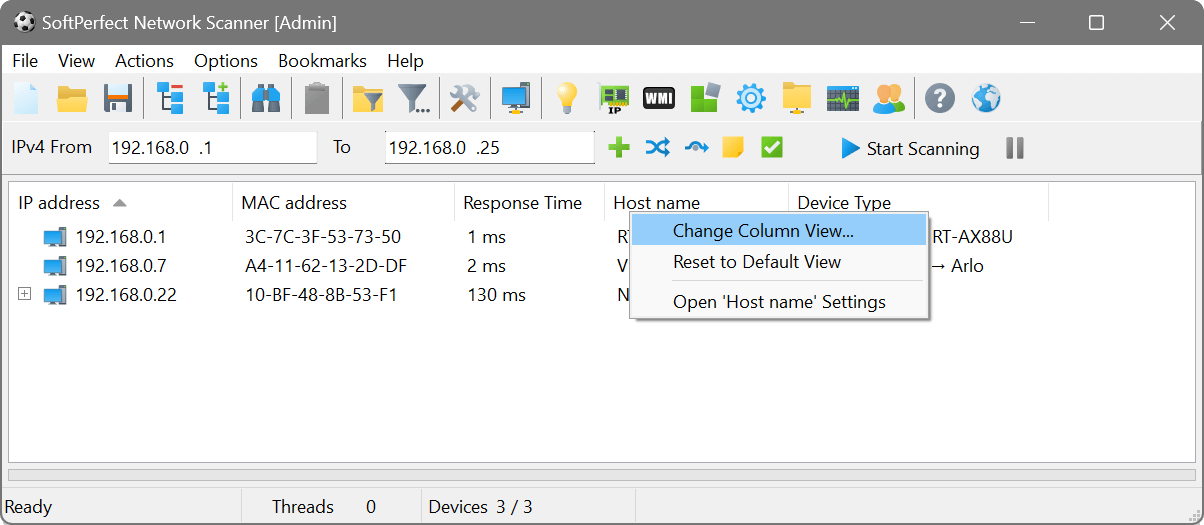
You can customise how values in any column are displayed. Right-click a column header and choose Change Column View:
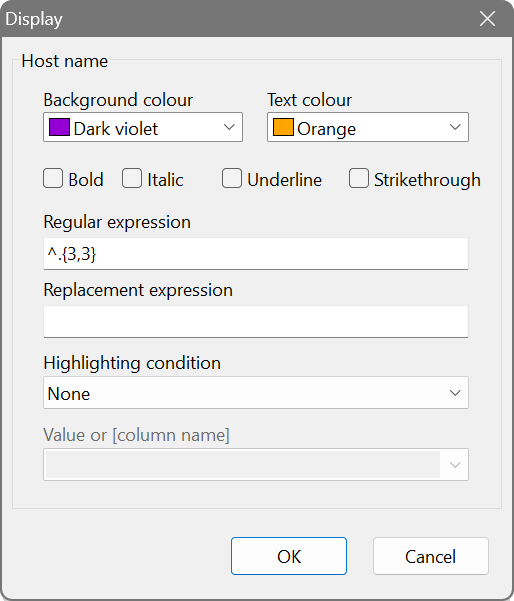
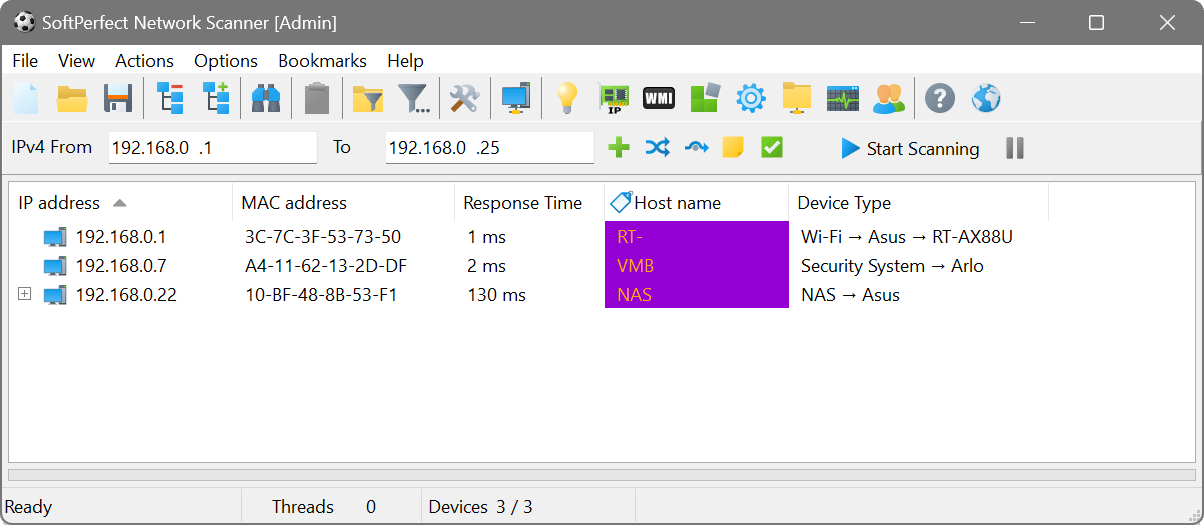
- Background colour / Text colour
- Set custom colours for the column cells.
- Bold / Italic / Underline / Strikethrough
- Apply font styles to the column text.
- Regular expression / Replacement expression
- Transform displayed values using a regular expression. For example, the pattern ^(.{3}).* with replacement $1 extracts the first three characters of each value.
- Highlighting condition
- Apply the colour and style only to cells matching a condition. Available conditions: Equal, Not equal, Contains, Doesn’t contain, Less than, Greater than and Regex. Leave set to None to apply the formatting to all cells.
External applications
Custom third-party applications are configured on the Applications tab in scan options. Once configured, they appear in the device context menu and can be launched for any discovered device. See the Applications tab for full details on setting them up, including user-prompted parameters and global variables.
You can group applications by using a vertical bar in their names, e.g. RDP tools | mstsc and RDP tools | Remote Desktop Manager. This creates a submenu in the context menu.
Toolbar customisation
Choose View → Toolbar Settings from the menu to customise which buttons appear on the toolbar. Use Mark All/None to quickly toggle all buttons.
Keyboard shortcuts
Keyboard shortcuts can be customised on the Shortcuts tab in scan options. Double-click any action to open the shortcut assignment dialog. Use the search field to find a specific action by name.
Row spacing
Choose View → Row Spacing to adjust the vertical density of the results table. Three levels are available: Compact, Standard (the default) and Expanded. A tighter spacing fits more devices on screen, while a wider spacing can be easier to read.
Dark mode
Toggle dark mode via View → Dark Mode. This switches the application to a dark colour scheme that is easier on the eyes in low-light environments.
Filter management
The advanced filter panel lets you create filters on the fly. To save and manage your filters, use View → Quick Host Filter → Settings. This opens the Filters dialog where you can edit or delete saved filters.