Device history
The Network Scanner can remember every device it has ever seen on each of your networks. Once history recording is on, the scanner builds a long-term picture of what belongs on a given LAN, how often each device is online, and when newcomers show up. This turns a series of point-in-time scans into a running record you can audit, search and report on.
What gets recorded
History is keyed on the device’s MAC address and scoped to the network it was seen on, so the same laptop that moves between your office and a client site is tracked separately on each LAN. Networks are recognised automatically by their gateway fingerprint, and given a friendly name based on the Wi-Fi SSID or the gateway’s reverse DNS where available.
Devices without a usable MAC address (for example, hosts behind a router) are not tracked, since there is no stable identifier to aggregate on.
Recording is controlled on the History tab in scan options, where you can also set how many days of data to keep.
History in the results
When recording is on, three additional columns are available in the scan results under a History column group:
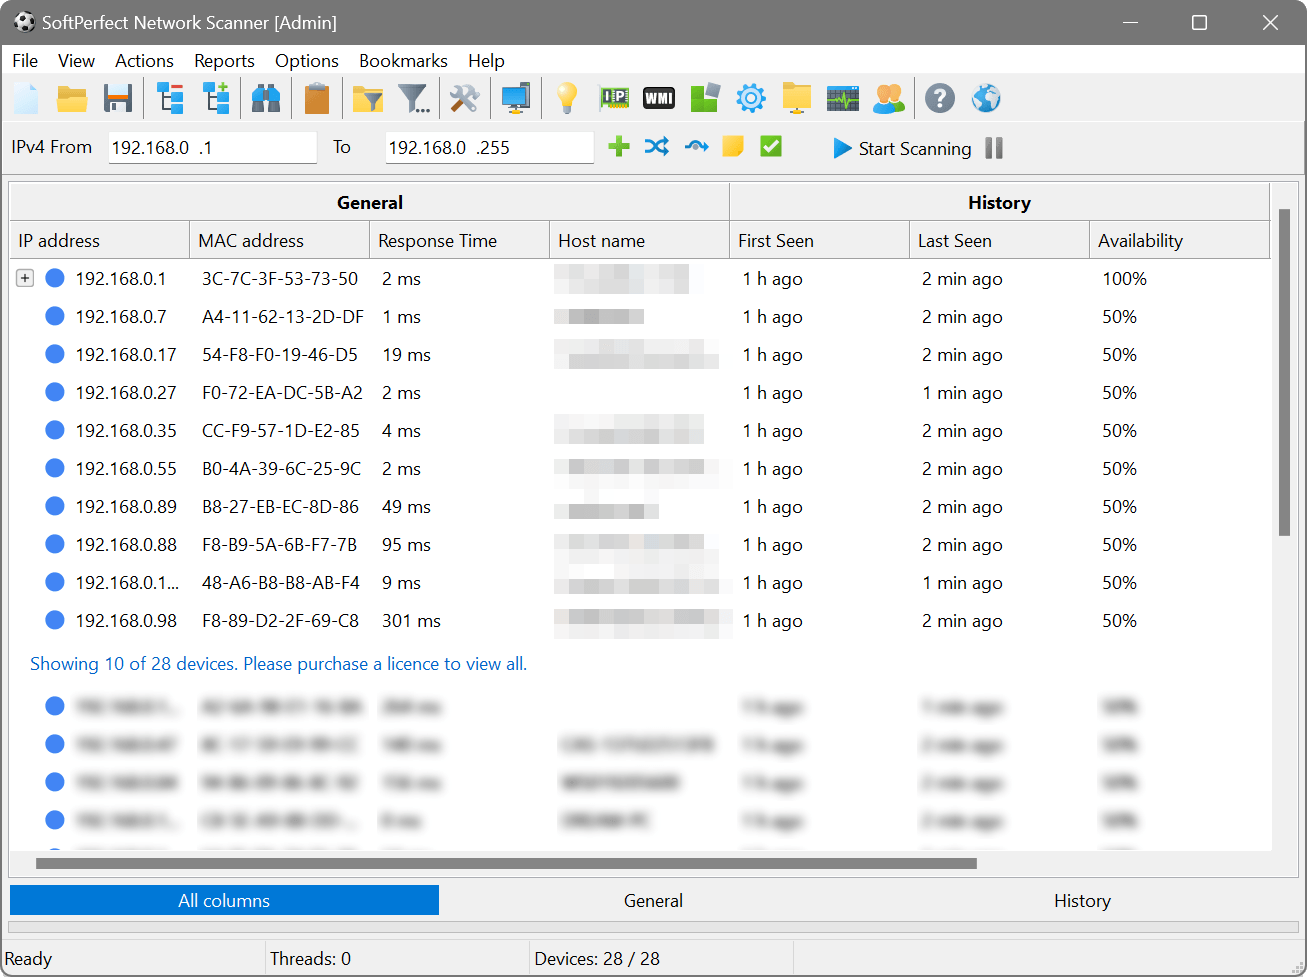
- First Seen
- How long ago the device was first observed on the current network. Hover the cell to see the exact date and time.
- Last Seen
- How long ago the device last responded.
- Availability
- The percentage of past scan sessions on this network in which the device was online. The tooltip shows the underlying counts (scans considered vs. times online).
Devices whose MAC address has never been seen on the current network before are shown in bold, making newcomers easy to spot at a glance. The very first scan of a brand-new network is not flagged this way, since with no prior data every device would qualify.
Per-device history
To inspect the full timeline for a single device, right-click it in the scan results and choose History. A non-modal window opens listing every recorded sighting, along with the IP address, host name and response time for each.
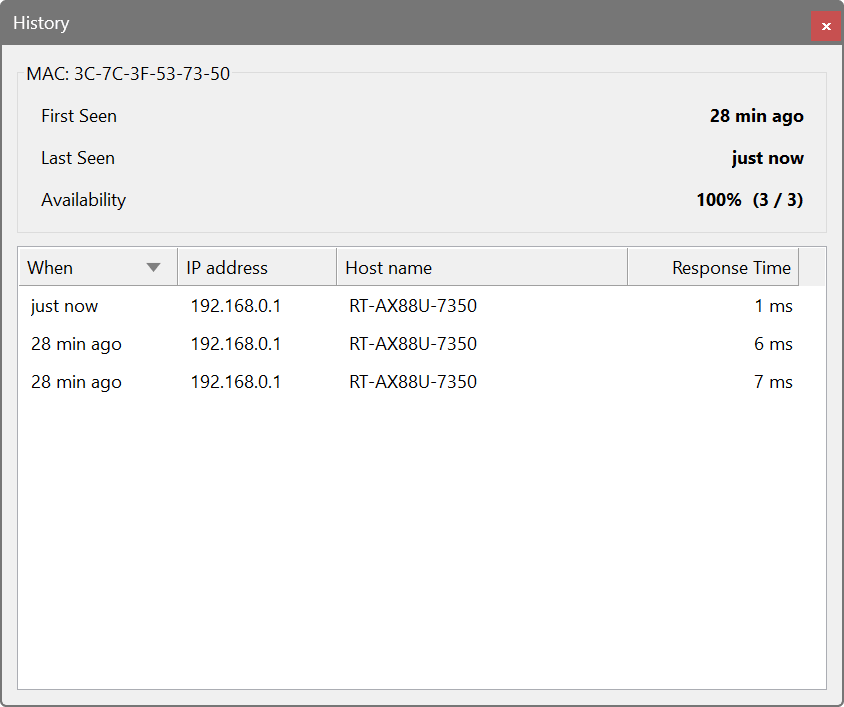
You can leave the history window open and keep working in the main view; it always refers to the device it was opened for.
Device Inventory report
The Reports → Device Inventory menu opens a sortable roster of every MAC ever recorded on the current network. Each row shows the device’s last known IP and host name, when it was first and last seen, its availability, and an equaliser-style sparkline of recent response times.
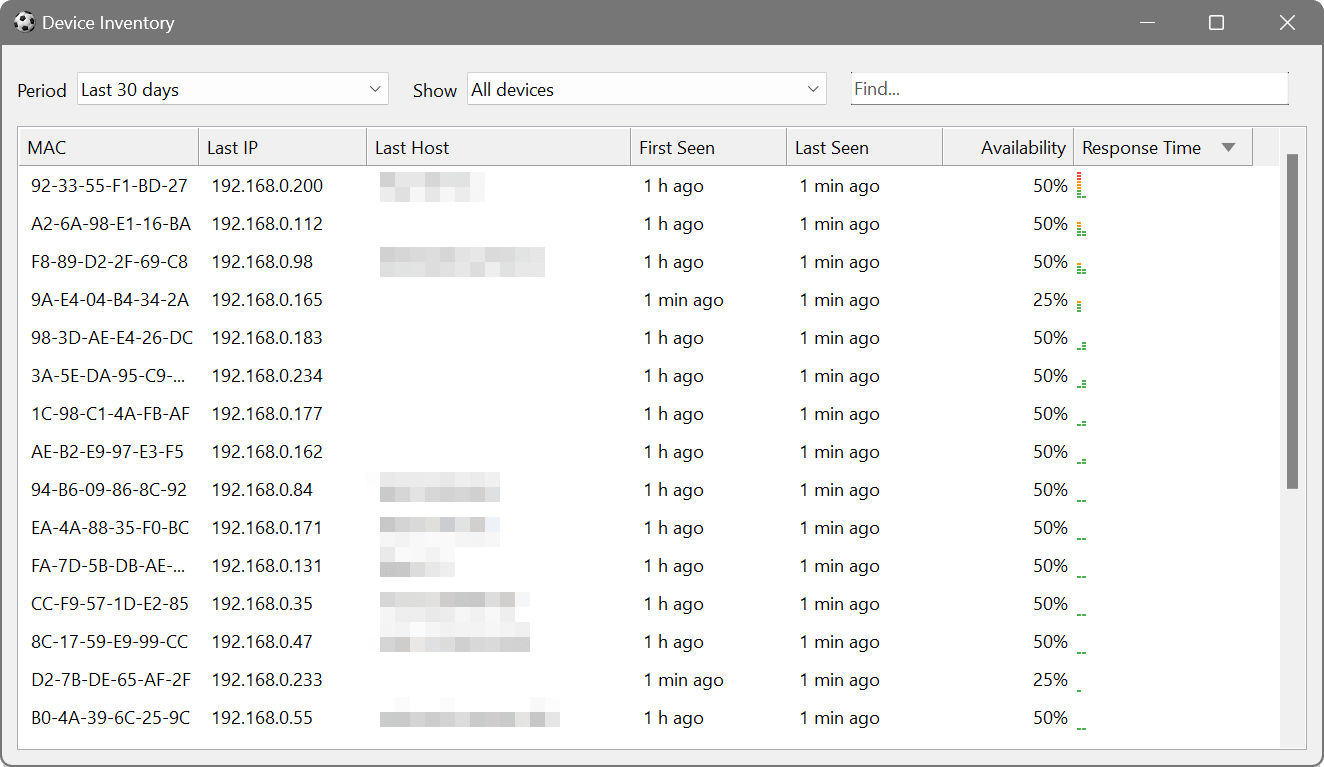
Use the Period combo to limit the report to a recent window: last 24 hours, 7 days, 30 days, 90 days, or all time. When a bounded period is selected, the Show combo lets you focus on devices that are new in the period or that disappeared during it; with All time it is disabled and every device is shown. The Find box narrows the list by substring. Double-click any row, or right-click and choose History, to open the per-device timeline scoped to the same period.
Enable device history in scan options and let the scanner run for a few rounds so it builds a baseline of your normal devices. On the next scan, any newcomer will appear in bold with a First Seen value of “just now” or a few minutes ago. Sort the tree by First Seen (ascending) to bring all recent arrivals to the top, and use Assign Friendly Name on the ones you recognise so future scans show a clear name instead of an unknown MAC.
With background scanning running over the server subnet, the Availability column gradually fills in. Sort by Availability ascending and the servers that have been dropping in and out float to the top. Right-click one and choose History to see exactly which scans missed it, then use that timestamped list to correlate with your monitoring or syslog data.
Open Reports → Device Inventory and set Period to Last 30 days. The grid lists every MAC seen on the current network in that window, along with first/last seen and availability. Switch Show to New in period to see only devices that first appeared during the window, or to Disappeared to see devices that had a presence before the window but were not seen during it. Type a vendor name or partial MAC into Find to narrow further. Double-clicking any row opens its detailed history for the same period.